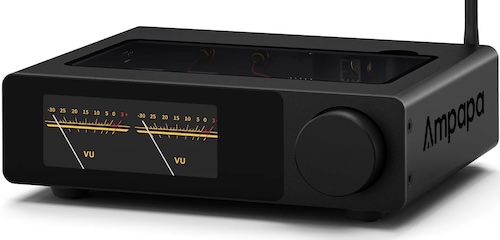
Ampapa D1 Integrated Amplifier
Small footprint, serious engineering — and those VU meters
I picked up the Ampapa D1 on Amazon.de from Douk Audio/Ampapa after initially reading about it on AudioScienceReview here. I have been listening to this little amplifier for about a month now, in a few different configurtions which I will get to later in the review.
Having previously written reviews (and been very impressed by) the 3E Audio A7 and the very similar (from the outside) Aiyima A80, I was looking forward to putting the D1 through its paces, and I mostly been very impressed. If I was to summarize the D1 offers a great balance of the features I feel are essential for a modern Class D amplifier:
The screen is small but bright, with legible text and fluid VU meters. Inside, the D1 brings the 2025 feature set that should be standard on Class D: post‑filter feedback (PFFB) for better linearity and load‑invariant handling, and what I feel is crucial a proper high‑pass filter (HPF) to protect your main speakers when handing off bass duties to a subwoofer.
Note: I bought the D1 from the Douk Audio/Ampapa Amazon listing. It currently retails for around $199, and there are often discount vouchers on both Amazon and the Douk site.
• Amazon product page: Ampapa D1
• Official product page + manual page with more technical details: Douk Audio / Ampapa D1
Ampapa is a newish sub‑brand from Douk Audio, the same folks behind many DIY‑friendly amps, DACs, and accessories, I have owned many Douk Audio products over the years but strangely this is the first I have reviewed. In recent years, Douk has been steadily refining its higher‑tier designs, and Ampapa looks like their brand for those more polished, living‑room‑ready products.
So how well does it work in practice, and more importantly, how good does it sound?
Read on to find out.
Unboxing and Build Quality
The Ampapa D1 arrives in clean, secure packaging that immediately signals thoughtful design.
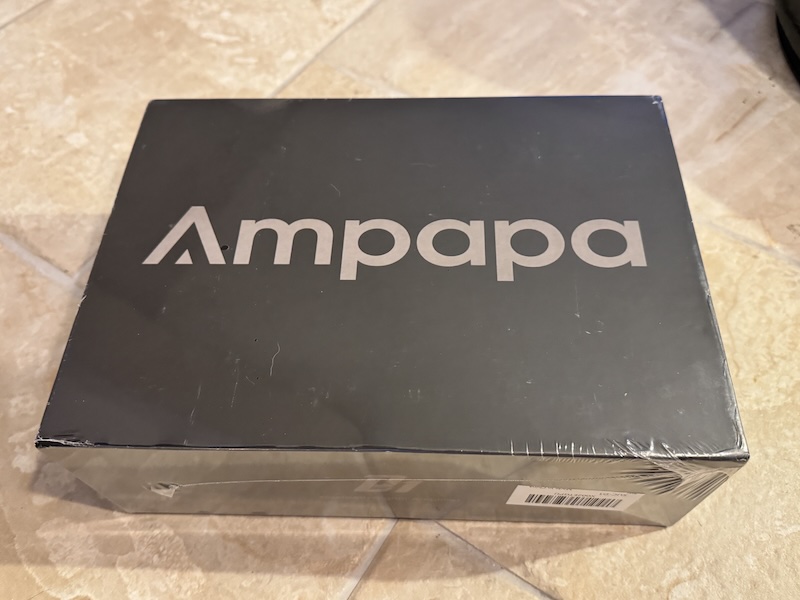
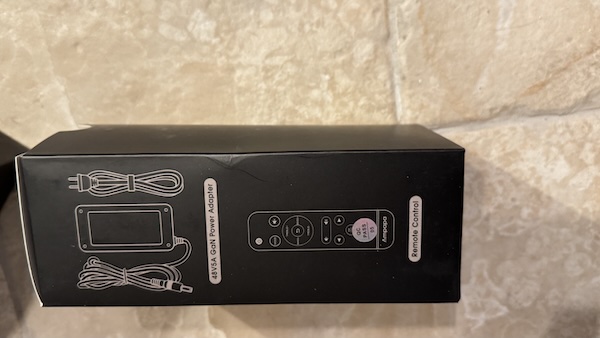
The back of the box provides lots of inforamtion including the specifications (but I will provide them in detail later in ther review):

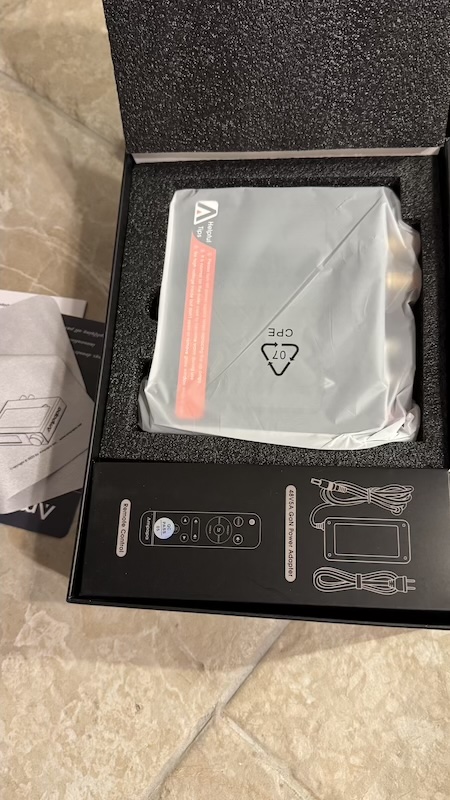
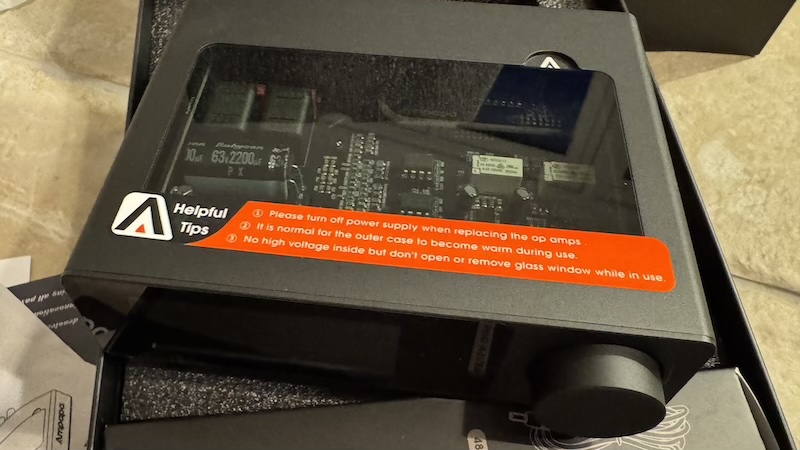
Opening the box, you’re greeted with the nice little visual guide to the D1:
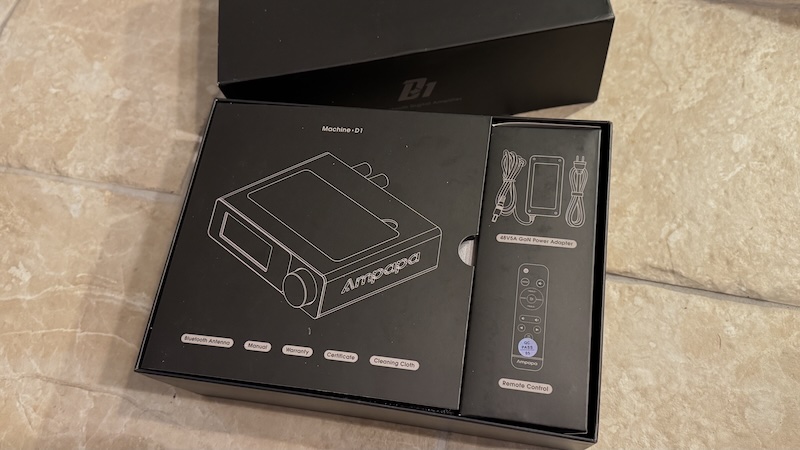
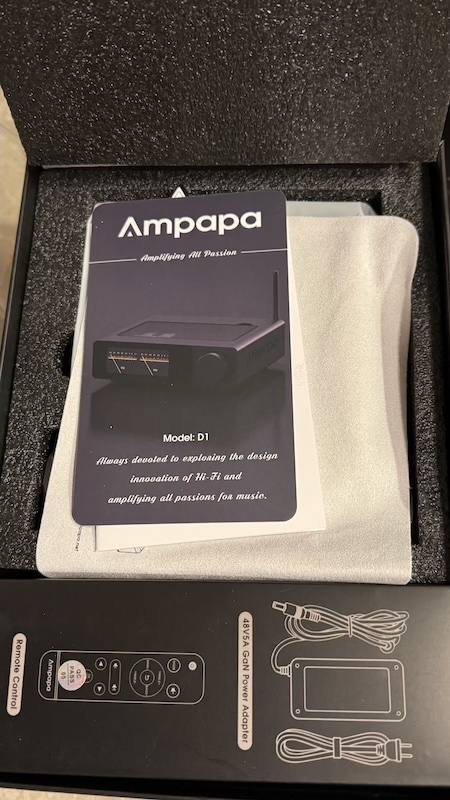
With the amplifier itself nestled protectively underneath, along with documentation visible on top:
 |
 |
The accessories are neatly organized in a separate compartment:
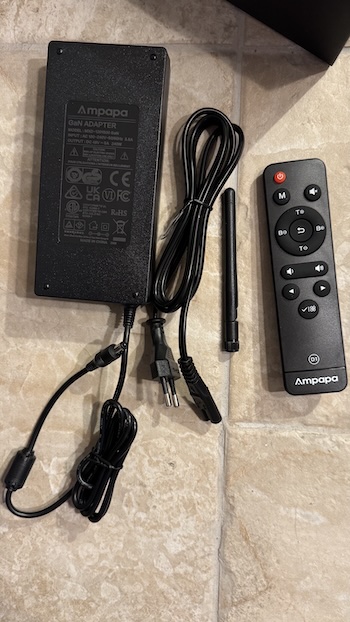
Taking everything out, you get a comprehensive set of what you need to get started:
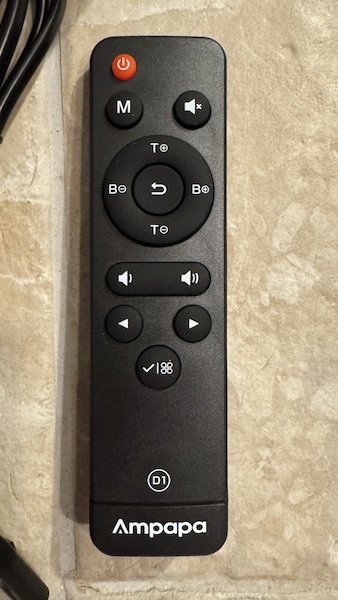
The remote is another great option with the D1, I like the simplicity of the tone controls especially:
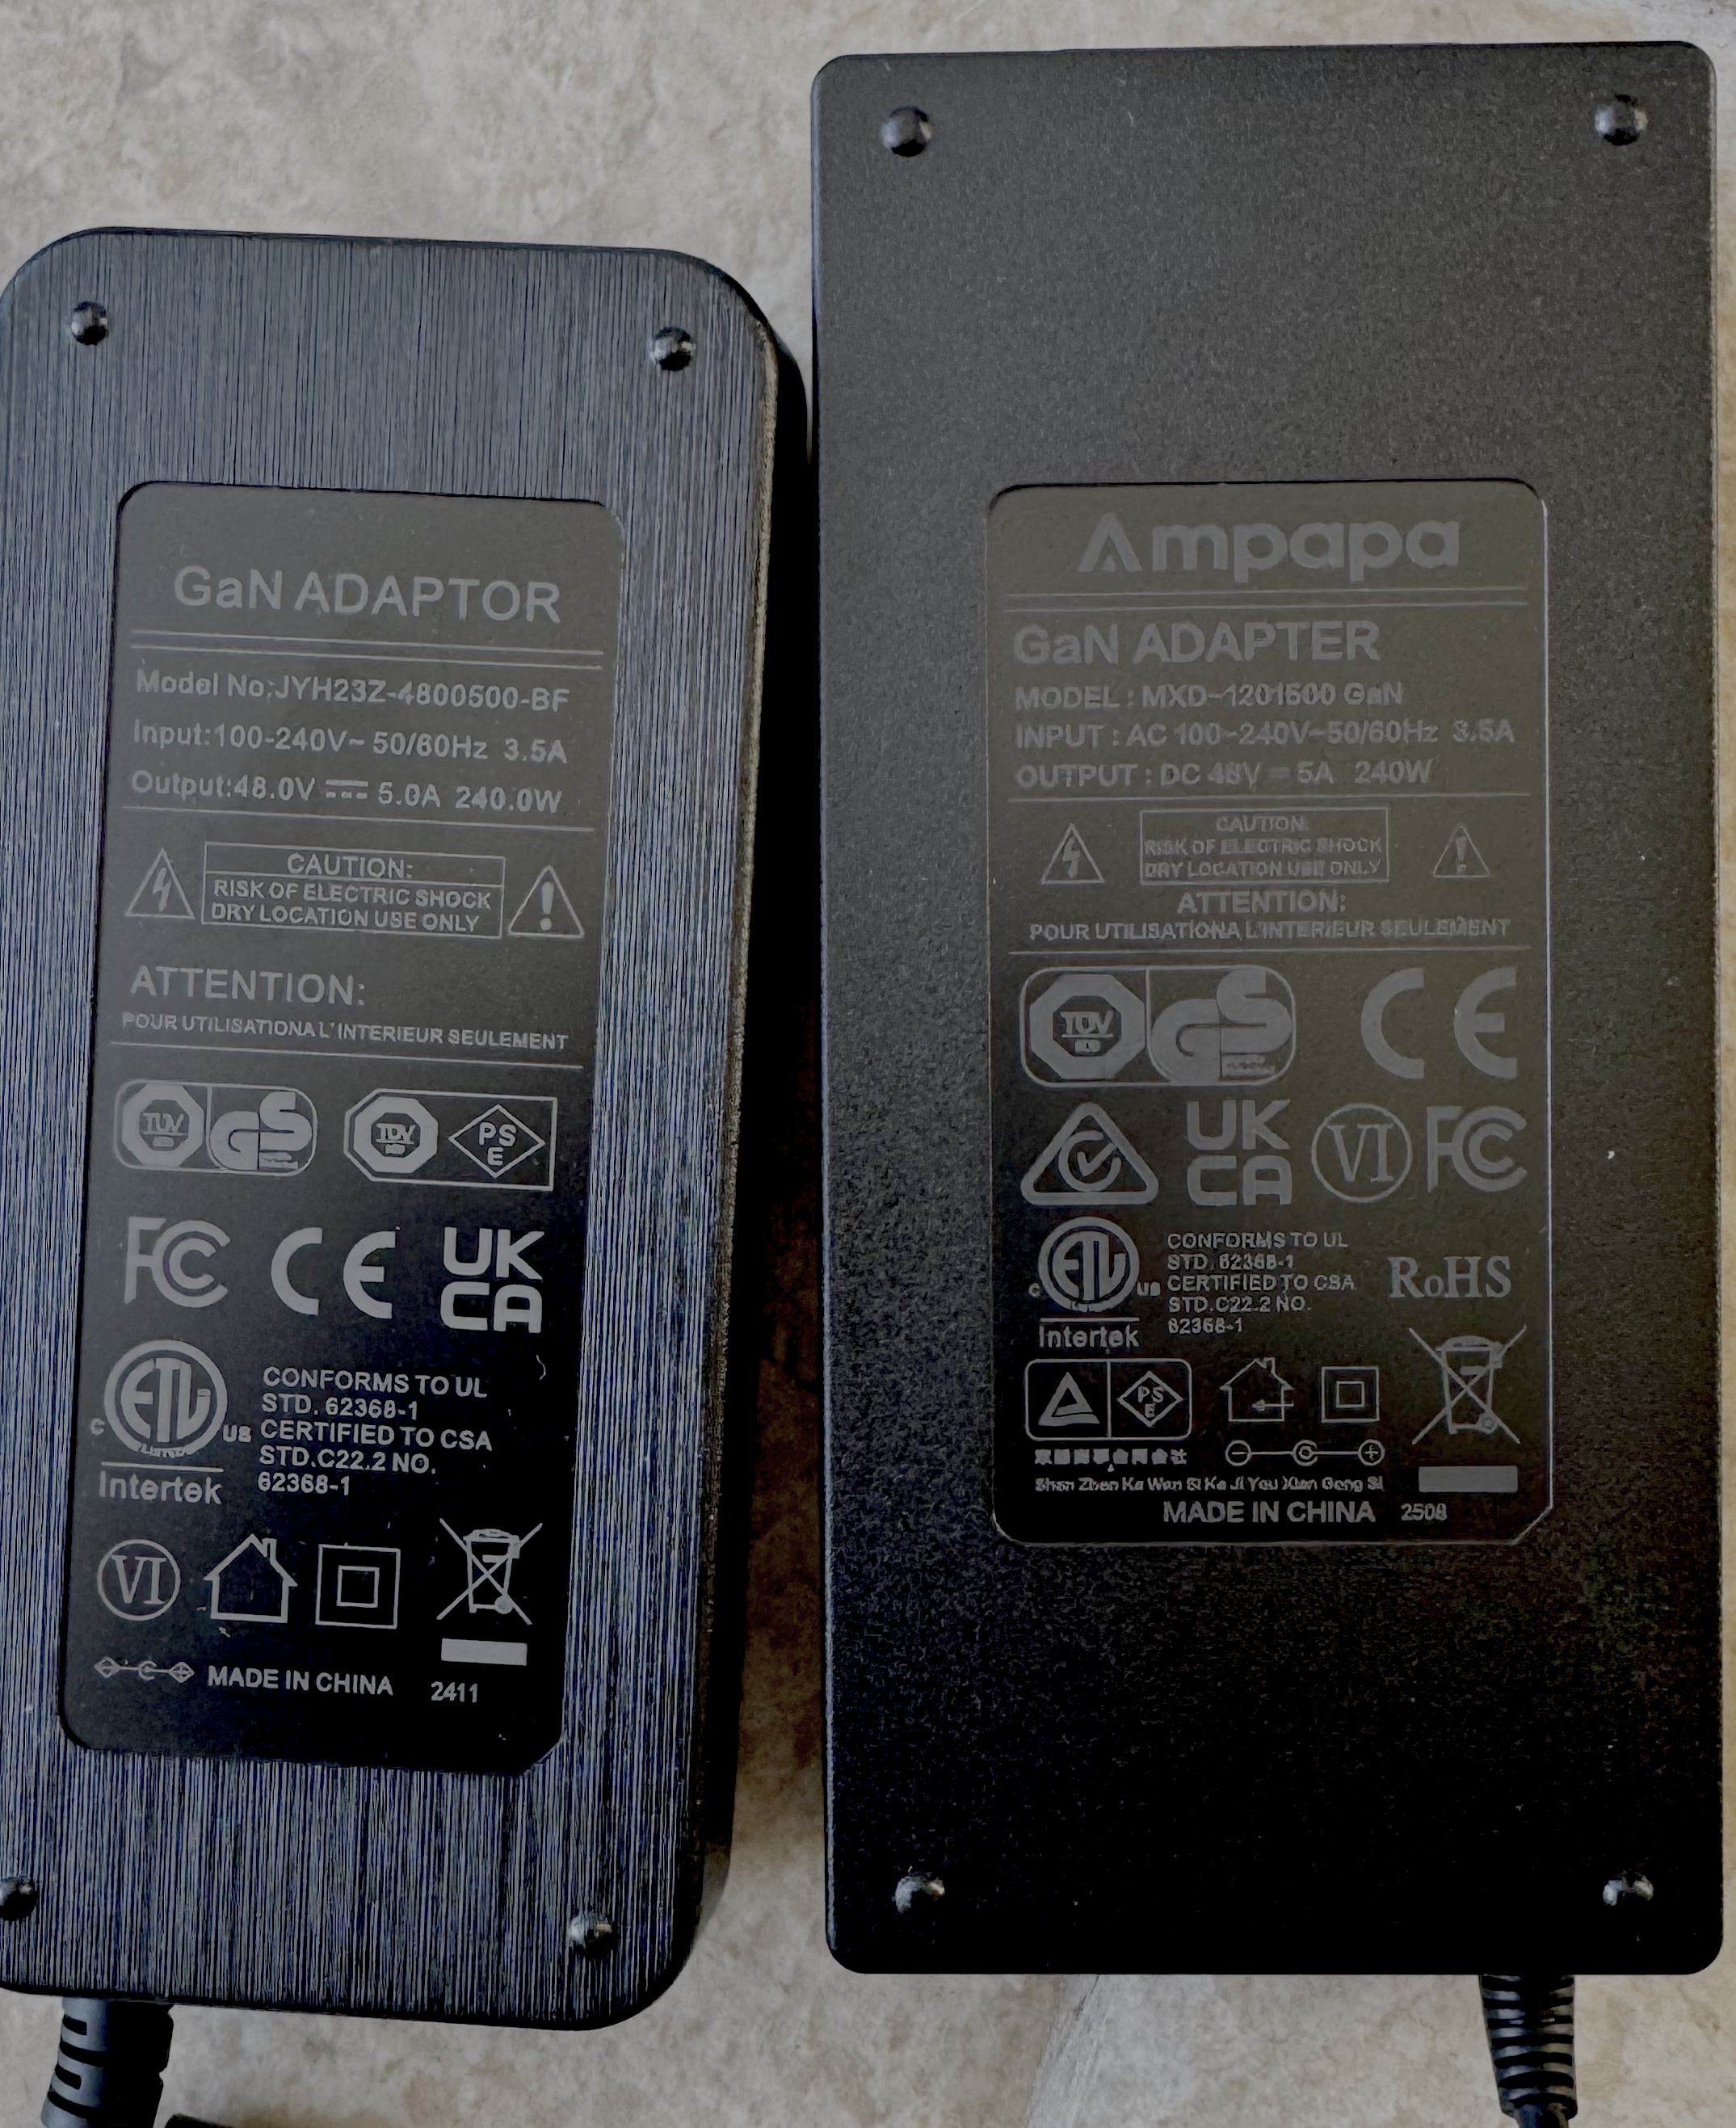
The power supply is a quality unit capable of delivering the 48V 5a current for the D1’s Class D amplifier section:
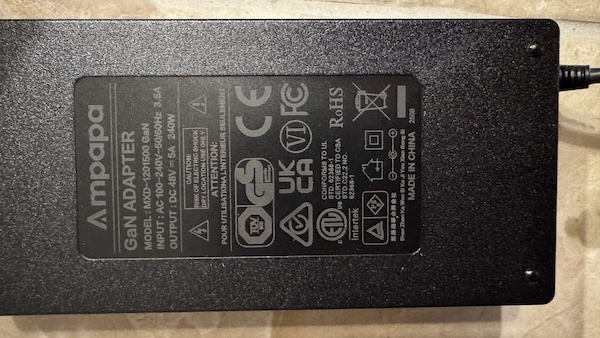
The power adapter is a little bit bigger than other similar GaN adapters I have from other class D amplifiers:
The chassis itself is an interesting, compact brick with chamfered edges with tempered glass on top, and a solid volume control:
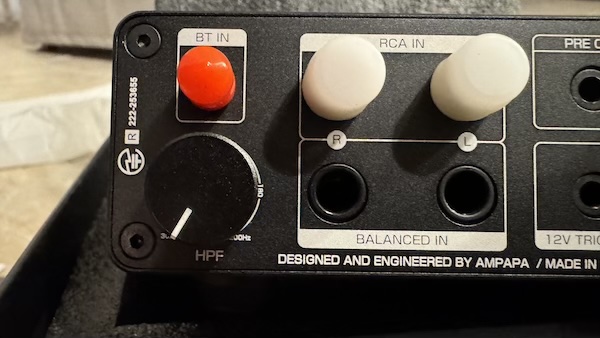
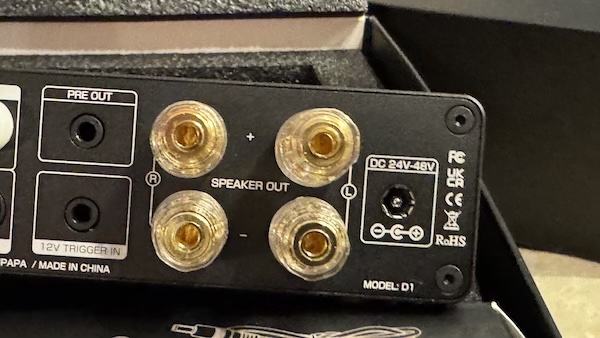
The rear panel is logically organized with all connections clearly labeled:
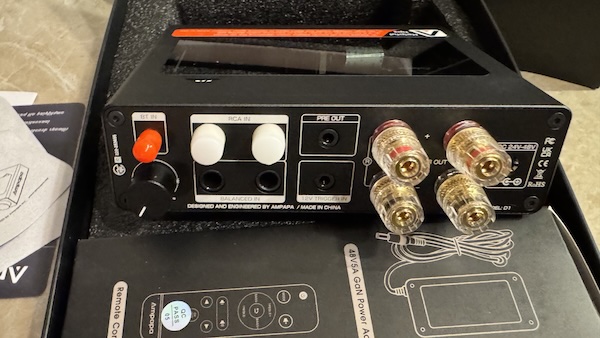
The analog input section offers both RCA and TRS (balanced-style) line-level inputs, along with Bluetooth connectivity:
The speaker binding posts are robust and accept banana plugs or bare wire with ease, I would have liked these to be staggered slightly (like recent Aiyima and Fosi Audio designs), but that is not really a problem:
I love the triggered input and when listening with my WiiM Streamers it worked perfectly to wake up the D1.
The build quality is genuinely impressive for the price. It feels like a well-engineered compact class D amplifier with lots of features.
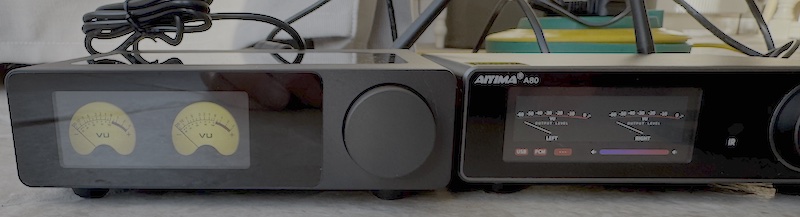
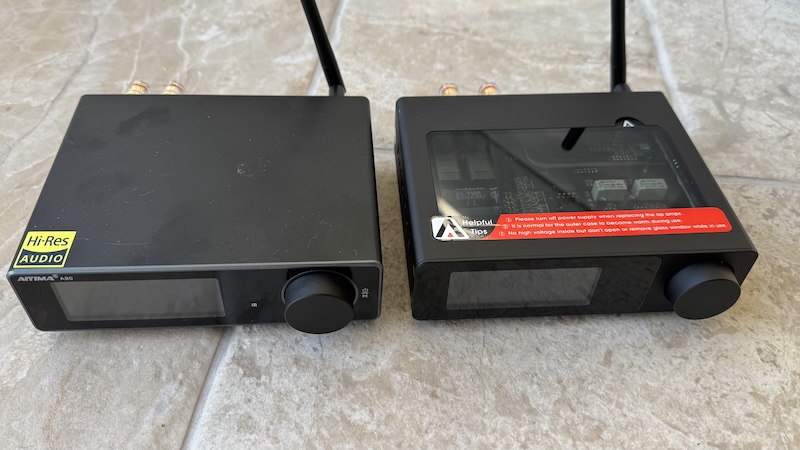
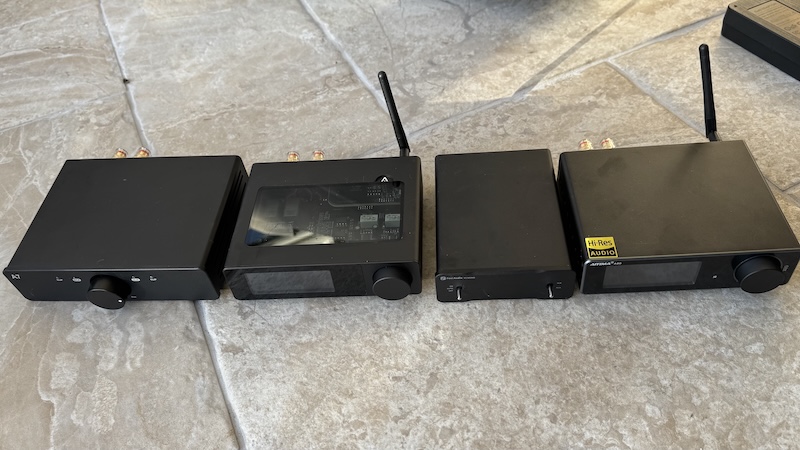
Size and Screen: Comparing to the Aiyima A80
If you’ve seen or used the excellent Aiyima A80, the D1 will feel familiar in footprint and “desktop hi‑fi” intent. Both serve the same use case: a compact integrated amplifier that doesn’t feel like a toy but while the A80 includes an ok DAC input, with the D1 Ampapa focused on the output, doubling down with an excellent HPF for integrating subwoofers with bookshelf speakers.
Here they are side-by-side to give you a sense of scale:
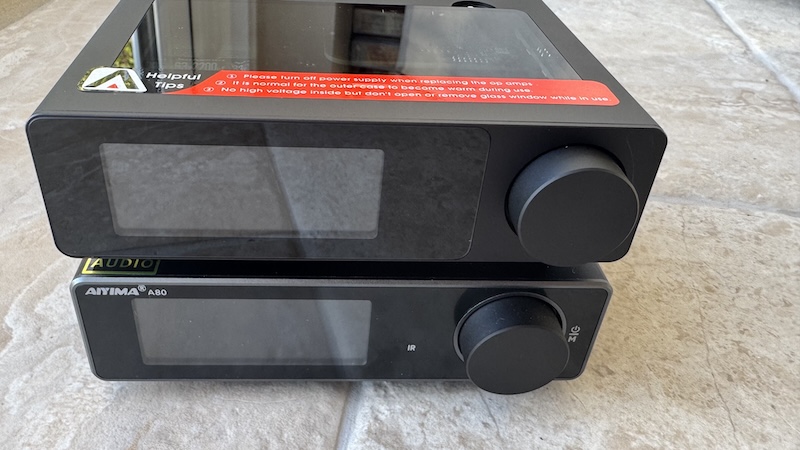
Here are some more comparison images, and you can see how they differ on the back with the focus of the D1 being around the High pass filter:
 |
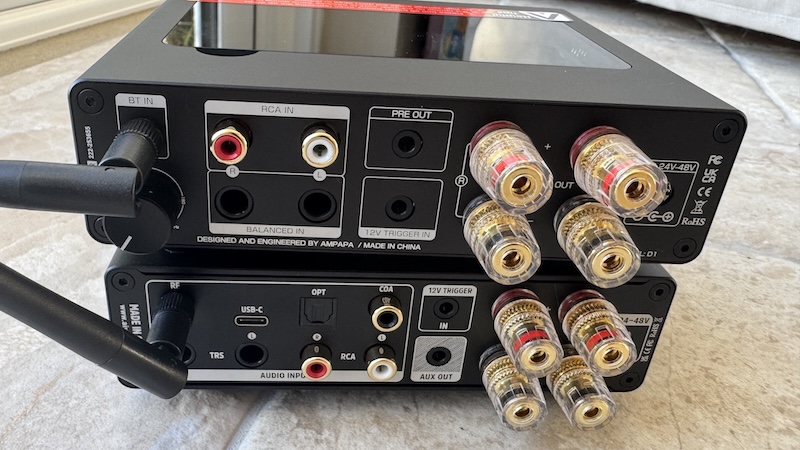 |
Both are excellent amplifiers, but as far as the screen and the glass top the D1 edges ahead in visual appeal (and larger selection) of its VU Meters:
The flexibility for 2.1 system integration with that High Pass Filter support is another advantage, especially if you already have a high-quality DAC. So I think Ampapa made the right choice with the D1.
My listening setup(s) with the D1
So, I tried the Ampapa D1 in a few different rooms around the house but ultimately has found a permanent home in my desktop system, paired with my KEF LS50 Meta speakers and a KEF subwoofer. And being fed either from a FiiO K17 which is not visible (via XLR) or from the WiiM Ultra via RCA. I liked the flexibility of the 2 high quality inputs on the D1 in this setup.
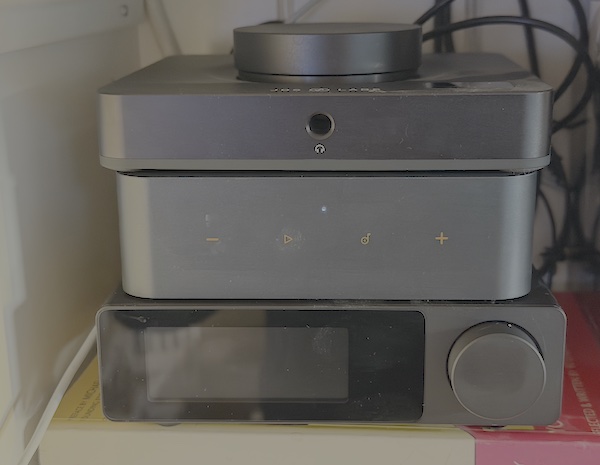
Here’s how it looks integrated into my setup:
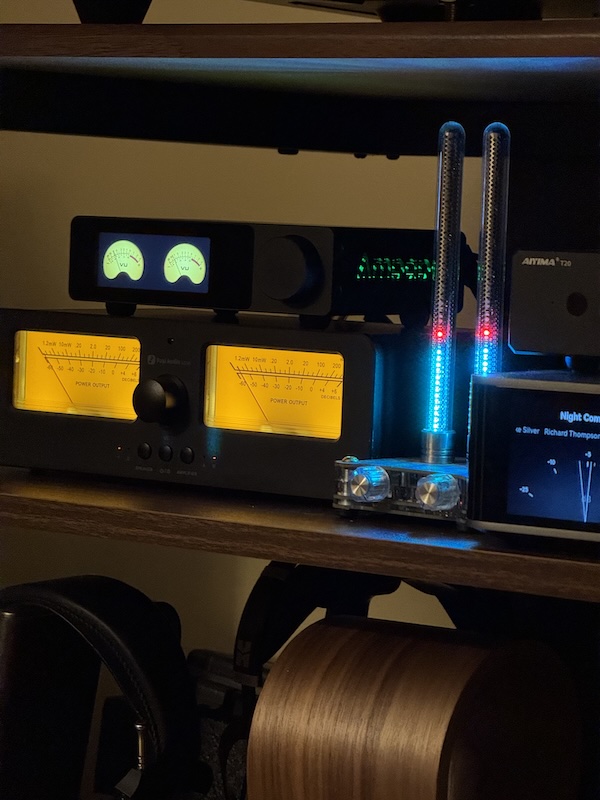
For a bit of A/B testing I did use the Fosi Audio LC30 to switch quickly between the D1 and a few other TPA3255
amplifiers:
In summary, other than the low end (when the D1 HPF was activated), these various amplifiers sound extremely similar. I would not have any complaints about the sound from any of these excellent class D amplifier. But having the PFFB support within the D1 did give peace of mind around the LS50 Meta performance with the D1.
I also used the Ampapa D1 for a few weeks in my living room ‘bookshelf’ space, this time with a WiiM Pro and a JDS Labs Element IV, this setup is more about the headphone output in the evening (hence the excellent Element IV), but when I can, I would listen to the wall mounted bookshelf speakers through the D1 during the day, and use some DSP room correction applied using the WiiM’s room correction feature:
So as you hopefully can see in both examples, this is a very compact amplifier. One that is compact enough to fit on a small desk or bookshelf without dominating the space, yet substantial sounding to feel like a serious piece of audio equipment.
Day-to-Day Impressions
With neutral tone controls (defeated), the D1 comes across clean and tight, exactly what I hope to hear from a modern PFFB Class D amplifier with no trouble driving my KEF LS50 Meta’s. Treble stays composed on trickier 4–6Ω loads, bass is controlled, and the noise floor is inaudible from the listening position.
For me the HPF is the killer feature, though, as I already had a KEF Kube subwoofer, crossing the KEF LS50 Metas at ~80 Hz was exactly how I like to get the best of both the Speakers and my KEF subwoofer, and the D1 didn’t break a sweat at reasonable room levels. The protection and headroom benefits of proper bass management cannot be overstated for bookshelf speakers. I did some comparisons using the WiiM Ultra subwoofer management together with the HPF, and I felt they complimented each other perfectly.
Bluetooth is convenient for when some friends were over,but for critical listening, I typically preferred either the RCA or TRS paths from a WiiM Ultra or either the FiiO K17 (and I even had some fun routing audio via the new FiiO Warmer R2R DAC into the D1 both directly or via some other headphone pre-amplifiers (like the Schiit Midgard).
Features and Performance
I have had many TPA5255 amplifiers over the years, and each year the options get better, and in 2025 (and now into 2026) I feel this D1 has the perfect combination of features that you should be looking for in a Class D amplifier.
The D1 incorporates three key technologies that elevate it above typical budget Class D amplifiers:
Post‑Filter Feedback (PFFB): By taking feedback after the output filter, the D1 keeps its frequency response flatter when driving real speakers (which have variable impedance). This improves damping, reduces distortion, and maintains treble linearity regardless of your speaker choice. Translation: more consistent tonality and control across different speakers.
High‑Pass Filter (HPF) for mains: Adjustable between 30–200 Hz with a 12 dB/octave slope, this feature protects small bookshelves from over-excursion and cleans up headroom when you cross over to a powered subwoofer. There’s also a full‑range mode when you’re not running a sub. This is the killer feature for 2.1 system builders.
Tone controls: ±10 dB bass/treble adjustments for quick system‑wide tweaks, easily bypassed when you want pure transparency. While it is great that the tone controls can be bypassed, I am more and more appreciating having simple Tone controls.
Inputs, Outputs, and Connectivity
The D1 offers RCA and TRS (balanced‑style) line‑level analog inputs, making it flexible for various source configurations. Bluetooth 5.2 is handled by a Qualcomm QCC304X chip supporting SBC, AAC, aptX, and aptX‑HD—handy for casual listening with good-enough fidelity, though for critical listening I preferred the wired RCA or TRS paths from a DAC.
On the output side, you get banana binding posts and a fixed line‑level pre‑out (rated 3.5 V). The pre‑out together with the HPF support makes the D1 a simple hub for subwoofer integration or for feeding powered monitors.
Op-Amp Swapping: Easy Access for Tinkerers
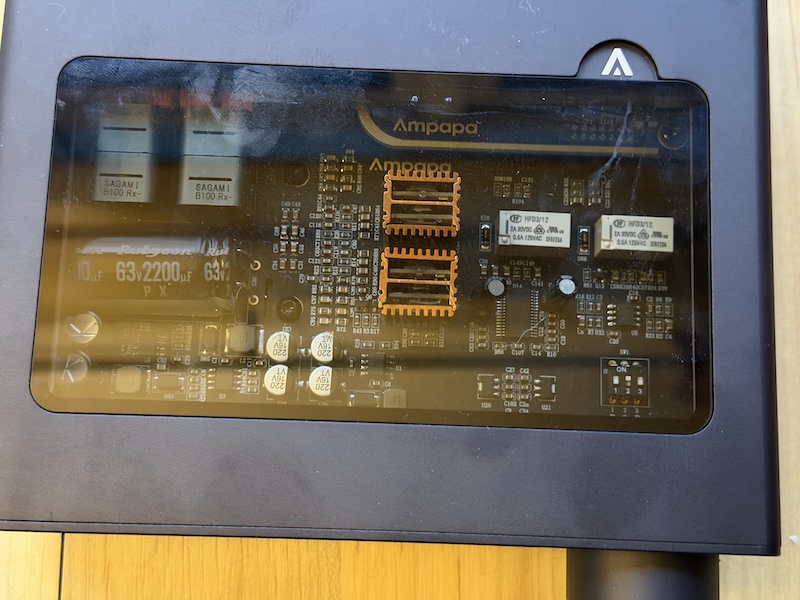
One of the joys of the D1 is how accessible the internals are for those who enjoy tinkering, but even when not
opening it up the subtle lights visible via the glass top are a nice touch.
So specifically, I have some Burson op-amps that they had sent me for their Burson Playmate 3 headphone amplifier but it I was curious to see that the process would be like to swap the stock op-amps on the D1.
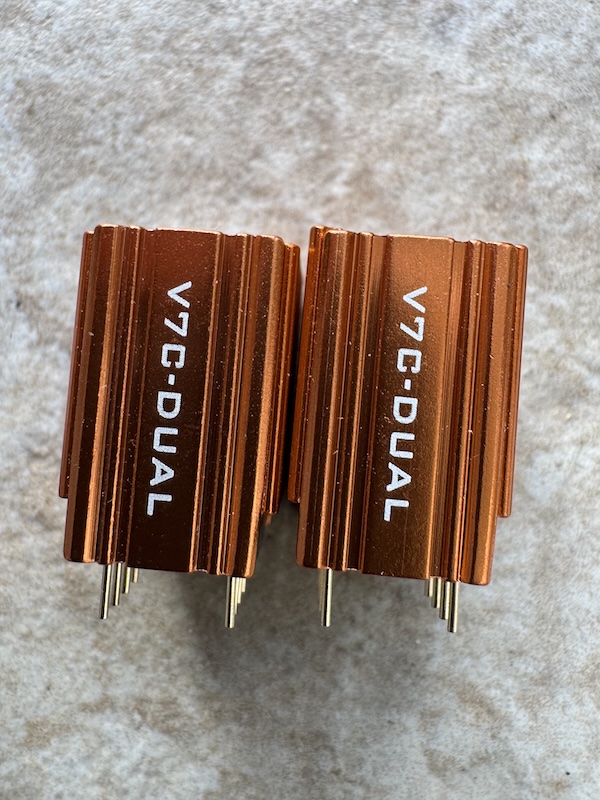
So, I started with using a pair of dual Burson V7 Vivids:
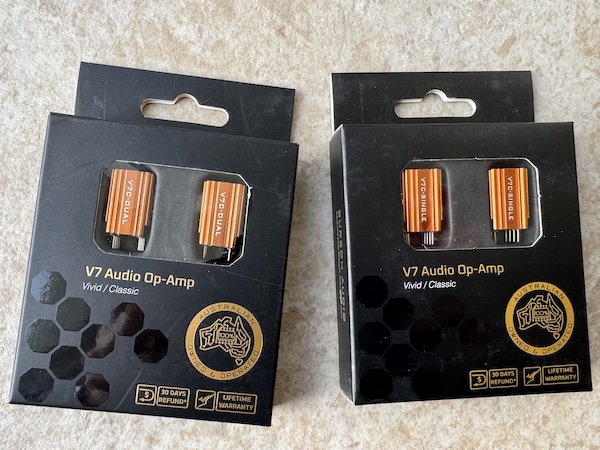
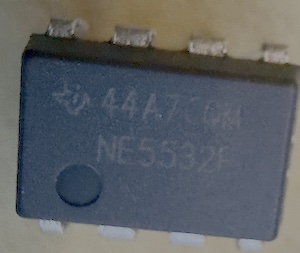
Important note: Use a pair of dual op-amps (not single), and verify the correct orientation before inserting them. Reversed op-amps can cause immediate damage.
So check the labels on the op-amps before continuing, the duals are ones the right hand side of this photo:
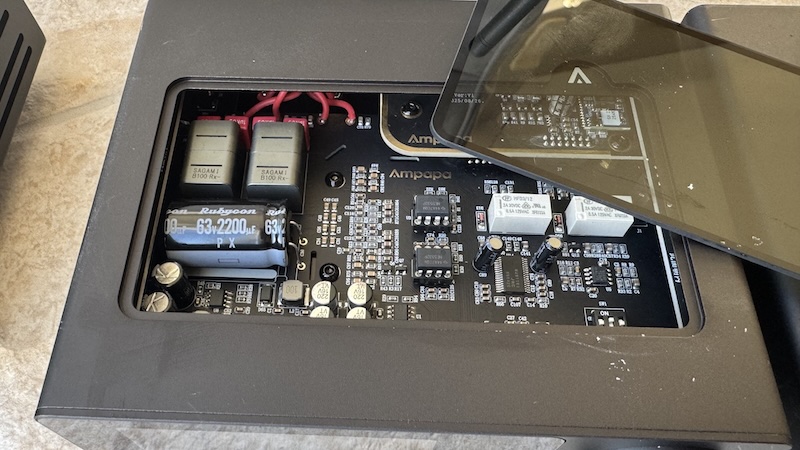
The tempered glass on top of the D1 lifts off easily with no tools required, revealing a clean, well-organized board:
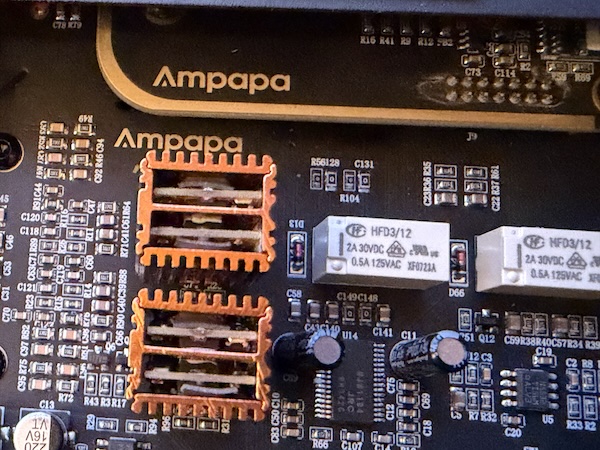
The op-amps are socketed and simple to identify, making swaps as straightforward as I’ve experienced in any desktop amplifier. I have marked the op-amps in this image of the board:
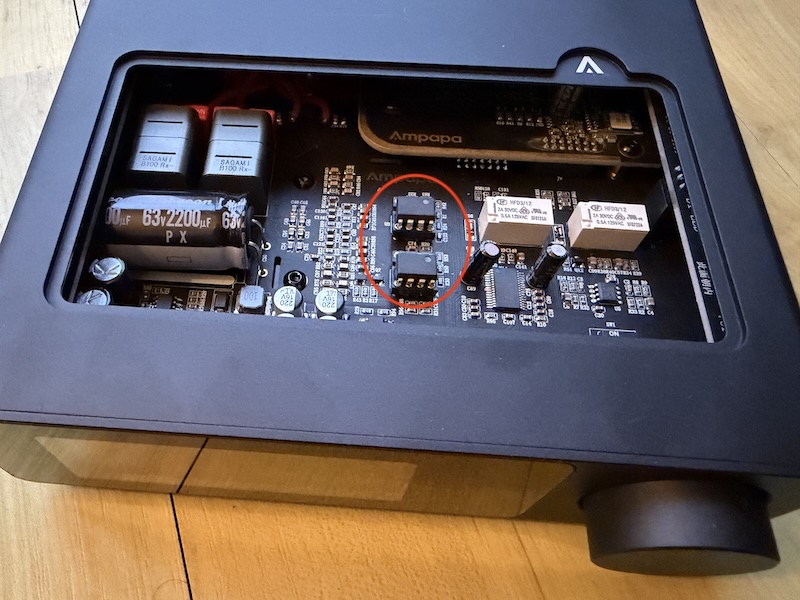
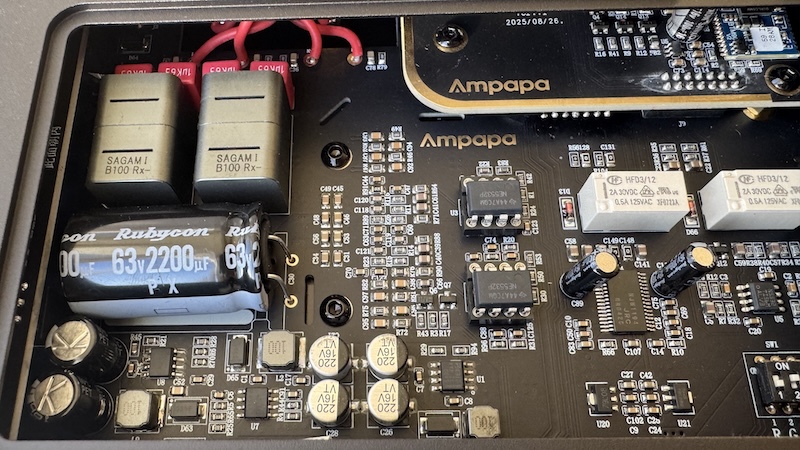
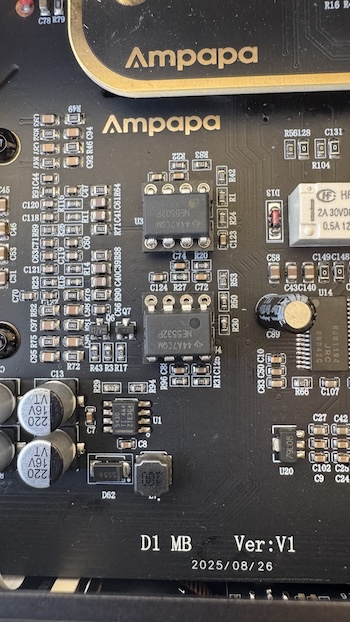
I do like the clean look of the D1 board:
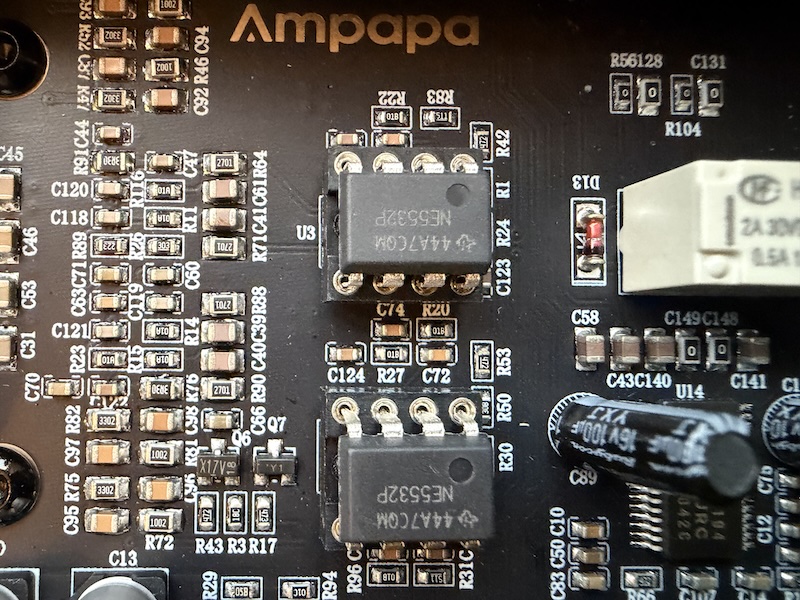
Here we are zoomed in on them, make sure to use the dot on each op-amp as the orientation is important:
Zooming in even further:
Removing them is simple—just apply gentle, even pressure and they lift straight out, though I did have to straighten the pins after I removed them:
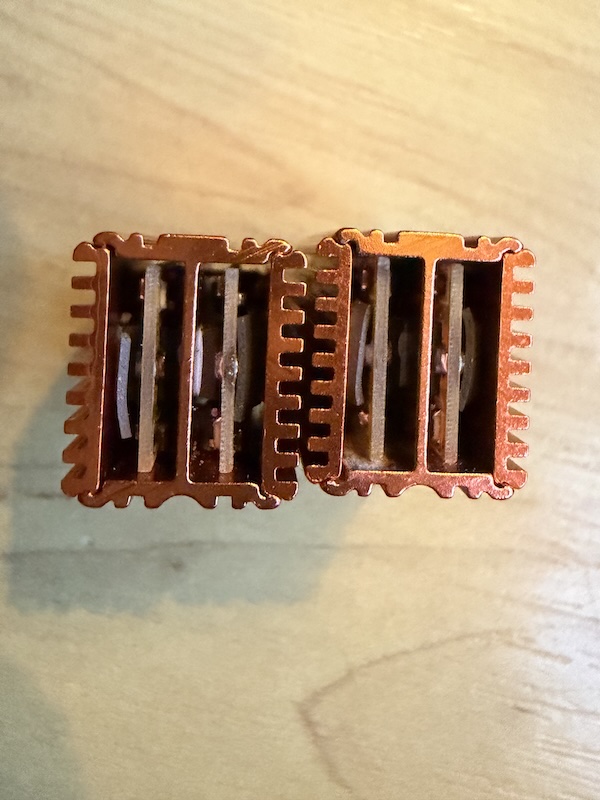
I decided to spend some time subjectively listening with a pair of Burson V7 Vivid dual op-amps installed. These are substantial, premium op-amps—noticeably larger than the stock chips—and I was curious whether the D1’s compact chassis could accommodate them:
Even with the V7 Vivids’ considerable height, they fit perfectly within the chassis:
Here’s the view with both Burson op-amps installed:
The glass top seated perfectly with no clearance issues whatsoever:
As for sonic changes? Initially, I thought I heard something “sharper” or slightly more etched with the Bursons. But like many things in audio, when I swapped back to the stock op-amps, I doubted whether there was a meaningful difference especially compared to for example, using PEQ filters; the sonic changes seemed very subtle, more similar to swapping reconstuction filters on a DAC than anything dramatic.
What I can say with confidence is that I loved the process. Unlike nearly all the Aiyima and Fosi Audio amplifiers I’ve owned (where swapping op-amps often requires significant disassembly and patience), the D1 makes it simple enough that I’d encourage anyone interested in tinkering to try and see if you can hear the difference.
Specifications and Measurements
| Specification | Value |
|---|---|
| Brand/Model | Ampapa D1 |
| Audio inputs | RCA / TRS / Bluetooth 5.2 |
| Audio outputs | Banana speaker posts / Pre‑Out |
| Max output power | 300 W ×2 (4 Ω) peak |
| THD+N | 0.002% |
| SNR | ≥ 114 dB |
| Frequency response | 20 Hz–20 kHz (±0.4 dB) |
| High‑pass filter frequency range | 30 Hz–200 Hz |
| High‑pass filter slope | 12 dB/octave |
| Bluetooth chip | Qualcomm QCC304X |
| Bluetooth codecs | SBC / AAC / aptX / aptX‑HD |
| Input sensitivity | RCA 2 V, TRS 4 V |
| Pre‑out rated level | 3.5 V |
| Matched speaker impedance | 4–8 Ω |
| Treble/Bass adjustment range | ±10 dB |
| Input voltage | DC 24–48 V / ≥4 A (5.5×2.5 mm) |
| Dimensions (W×D×H) | 155×124×42 mm (6.10×4.88×1.65 in) |
| Net weight | 742 g (1.64 lb) |
| Package dimensions | 268×192×95 mm (10.55×7.56×3.74 in) |
| Package weight | 1.73 kg (3.81 lb) |
Power Outputs
| Load Impedance | Continuous Power Output |
|---|---|
| 4 Ω | 120 W + 120 W |
| 6 Ω (48 V/5 A supply) | 110 W + 110 W |
| 8 Ω | 102 W + 102 W |
Note: Headline specifications of “300 W ×2 (4 Ω)” figures are typical instantaneous/peak ratings; continuous power depending on supply of a 48V 10A power supply, since the D1 comes with a sensible 48V 5A I feel the outputs above are realistic. But it is still excellent output power for most small and medium-sized rooms.
Measurements
The manufacturer’s Audio Precision plots (SINAD/THD+N, frequency response, crosstalk) in the manual show very low distortion and flat response with PFFB engaged. See the manual page for full charts linked in the alert above.
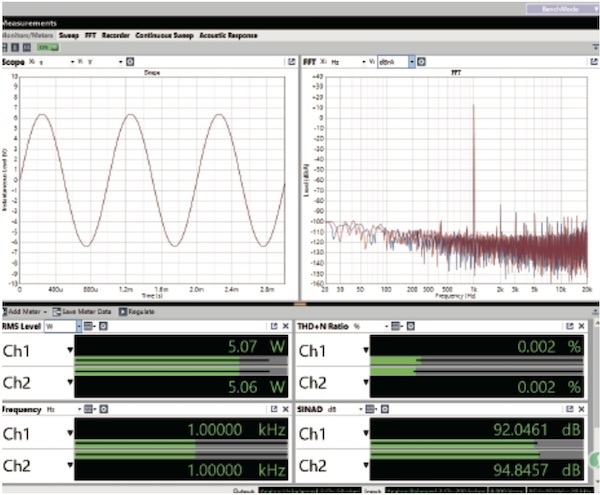
An additional third‑party technical review with comprehensive measurements is available on YouTube: Deep‑dive measurements of D1
I will update this review if I see more AP measurements appear, but for now I am happy with the results I am seeing in these measurements.
Rating
The Ampapa D1 earns a perfect pragmatic 5-star rating because I feel it delivers exactly what I expect from a modern desktop class D integrated amplifier should: clean PFFB implementation that yields speaker‑agnostic results, an adjustable HPF that’s the right way to integrate a subwoofer. When you add the excellent ergonomics and cool UI with the fun VU meters, and balanced inputs for the price, it is an easy recommendation. Then there is even the triggered inputs, the Bluetooth and super simple op-amp replacements for tinkerers.
Who it’s for:
- Small to mid‑size rooms where a compact integrated makes sense
- Builders of 2.1 systems who want to protect mains and maximize headroom
- Listeners who prefer neutral, low‑noise, low‑distortion amplification
- DIY enthusiasts and tinkerers who want to experiment with op-amp rolling without disassembling the entire unit
Conclusion
The Ampapa D1 nails the mix of form and function: it looks great on a desk or shelf, but more importantly, it behaves like a modern amplifier should. PFFB keeps the sound consistent across loads, the HPF makes 2.1 integration seamless, and the UI and screen feel premium in daily use.
If you enjoy tinkering with audio gear, the D1 stands out as the best amplifier I’ve encountered for op-amp swapping—accessible, foolproof, and genuinely fun to experiment with.
At around $199 and often less with typical amazon discounts, it’s an easy recommendation and a terrific foundation for growing a compact system. I can’t wait to see what further enhancements we will see in 2026 but for now I feel this amplifier does everything I would expect from a Class D amplifier.