Burson V7 Vivid Op-Amps
Premium discrete op-amps for those who enjoy the art of tweaking
Op-amp rolling sits in a unique space within the audiophile hobby: it’s part tinkering, part experimentation, and part ritual. Burson’s V7 Vivid discrete op-amps represent the company’s flagship offering in this space — substantial, well-engineered modules that promise subtle sonic refinements for compatible amplifiers.
I would like to thank Burson Audio for providing a pair of single V7 Vivid op-amps and a pair of dual V7 Vivid op-amps for the purposes of this review.
If you are interested in finding more information about these products, you can find them at Burson Audio’s op-amp page.
The V7 Vivid dual op-amps retail for around $179 per pair, while the singles are priced accordingly. These are premium components aimed at enthusiasts who value the modding process.
I primarily used these op-amps in my Burson Playmate 3 headphone amplifier — one of my favorite headphone amplifiers from last year. But, since I was also reviewing the Ampapa D1 at the same time, and the D1 makes op-amp swapping extraordinarily easy, I thought it would be interesting to test the swap process and listen critically with both amplifiers.
This review takes a slightly different structure: after unboxing, I’ll walk through the replacement process for both the Burson Playmate 3 and the Ampapa D1, highlighting the differences in accessibility and showing exactly how to align the op-amps correctly — including some mistakes I made along the way.
Unboxing and First Impressions
The V7 Vivid op-amps arrive in simple, professional packaging, I got one pair of single and one pair of dual op-amps:
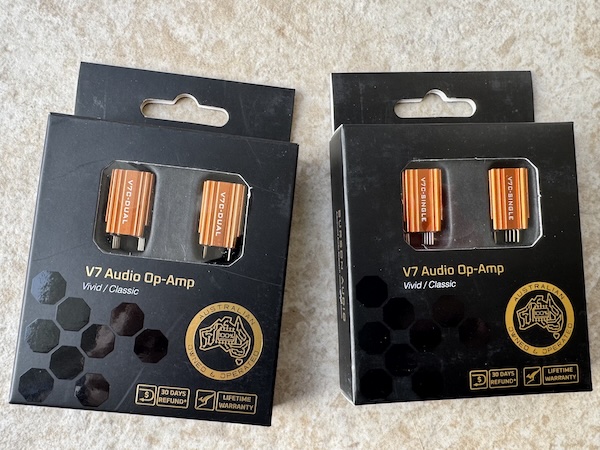
You will see it’s a proudly Australian product which I love to see.
Zooming in on a dual op-amp box:
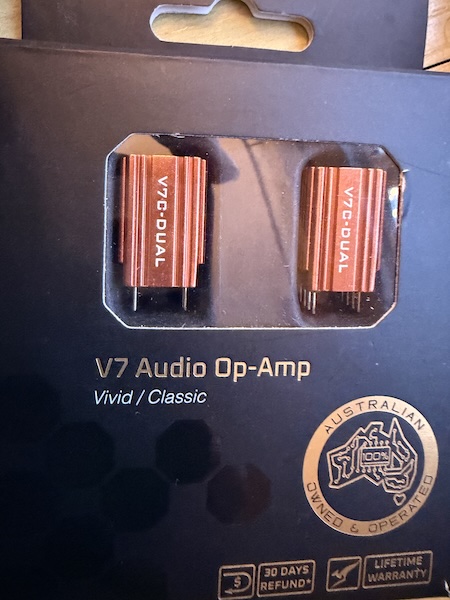
Opening up the box reveals the op-amps:

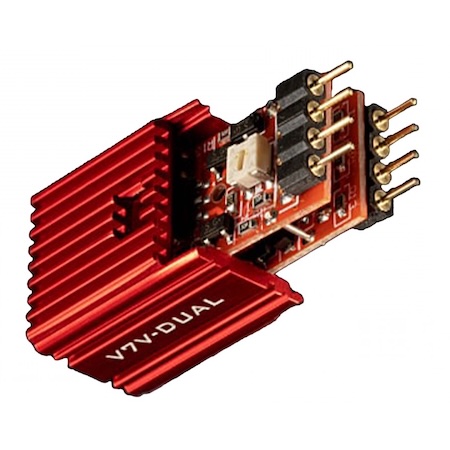
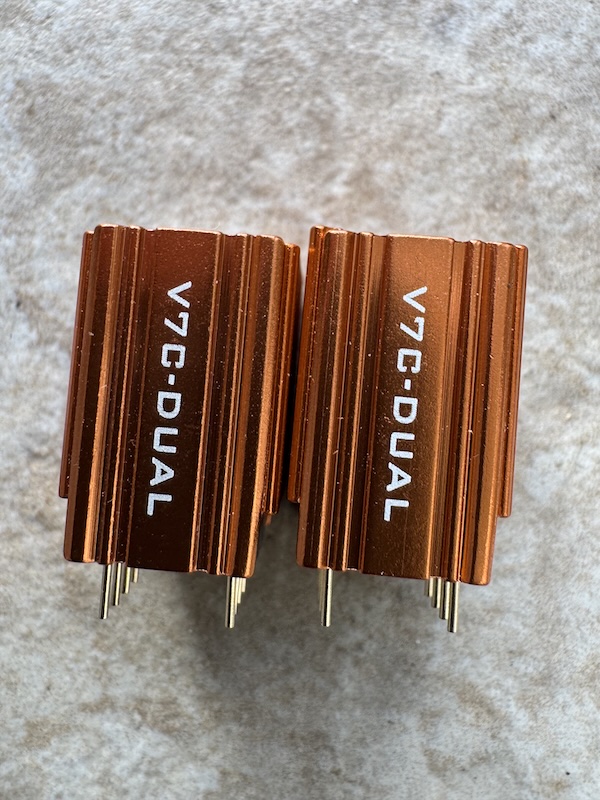
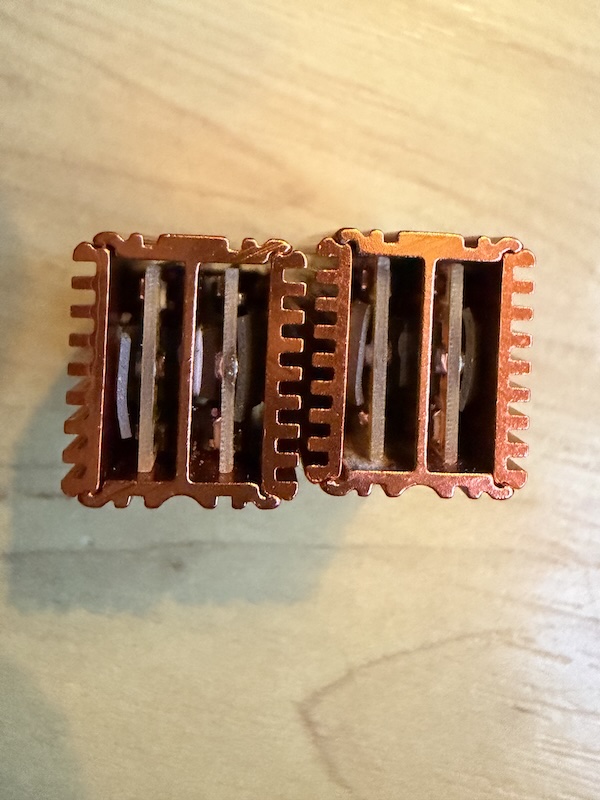
What immediately strikes you is the size, these are not small, surface-mount chips:
There is also an simple extension board that allows some flexibility when installing on op-amps on tight motherboards:

The heatsinks are machined aluminum, and the overall build
quality is exactly what you’d expect from a premium component.
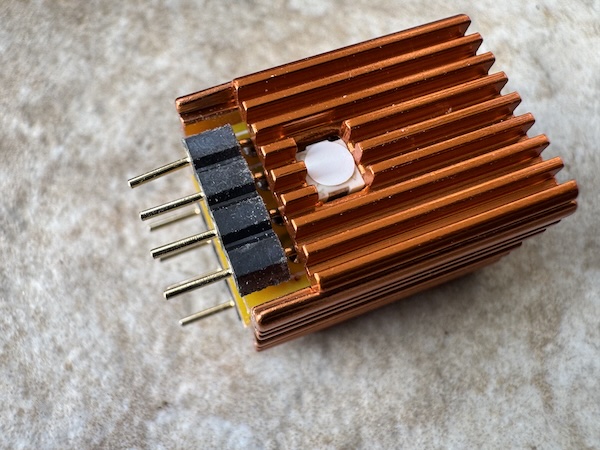
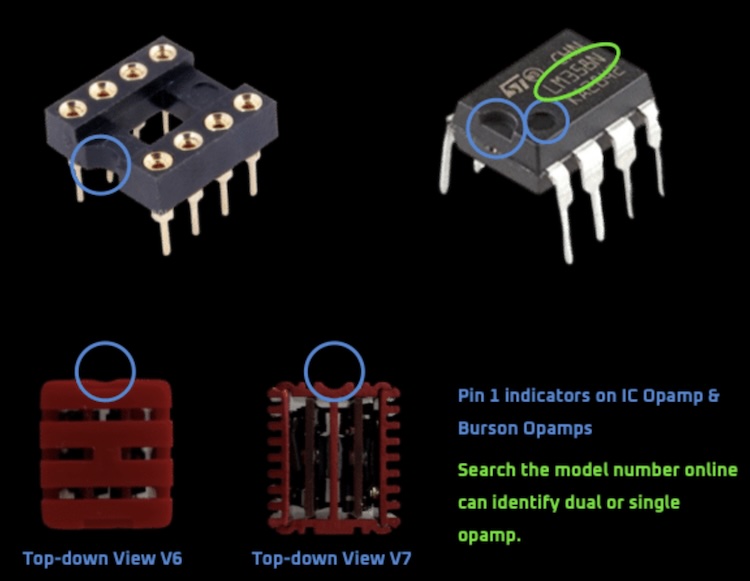
Each op-amp is clearly marked with orientation indicators (a critical detail we’ll return to during installation), and
the pins are gold-plated for reliable contact and longevity:
Swapping Op-Amps in the Burson Playmate 3
The Burson Playmate 3 is designed with op-amp rolling in mind, though it does require opening the chassis. Burson provides detailed instructions in the manual, and the process is straightforward if you follow them carefully.
Opening the Playmate 3
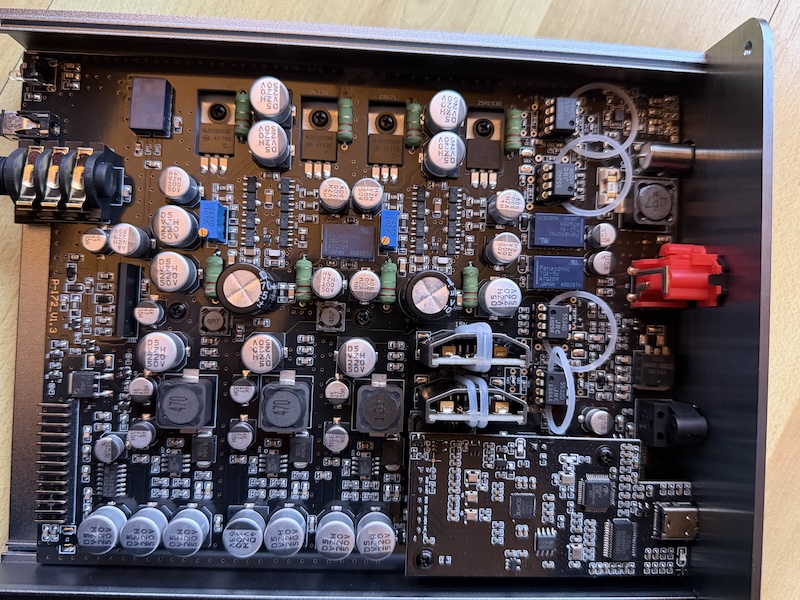
First, you’ll need to remove the bottom panel to access the internal board. The Playmate 3 uses a relatively simple disassembly process, though I actually went too far as you do not need to remove the bottom screws:
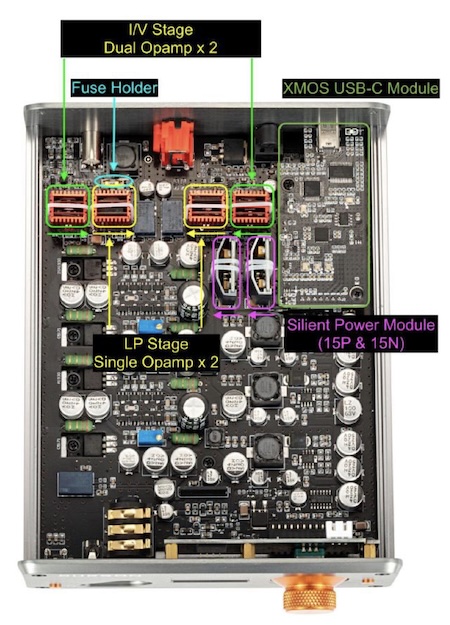
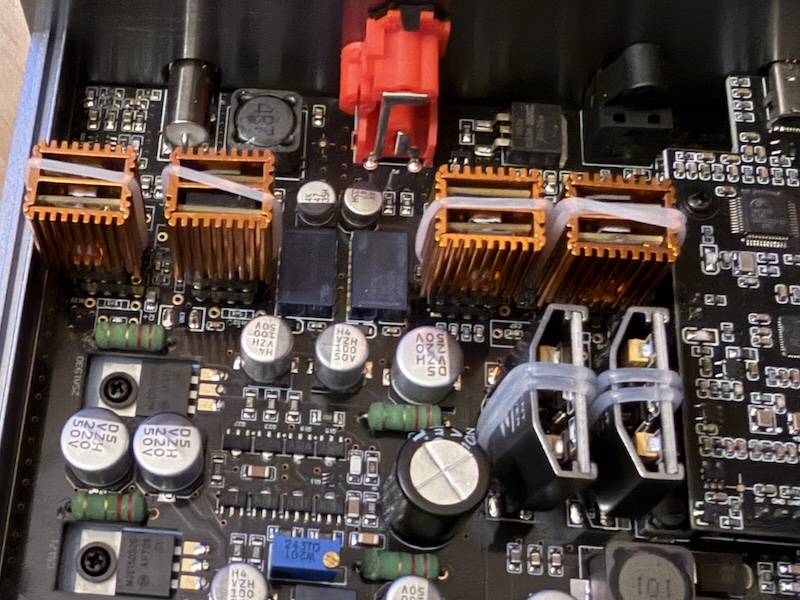
Once inside, you’ll hopefully be as impressed as I was with the clean layout, with the stock op-amps clearly visible with plastic extraction hooks:
Identifying and removing the stock op-amps
The op-amps are clearly visible and labeled. But here is an image provided by Burson as a guide to replacing the opamps:
Burson includes small plastic extraction tools (the white clips visible in the photos) to help remove the stock op-amps without damaging the PCB:
 |
| 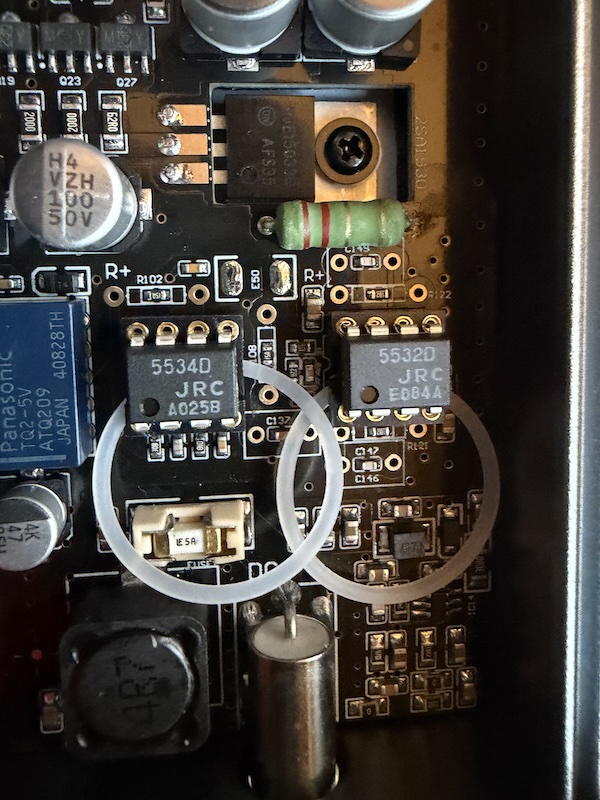
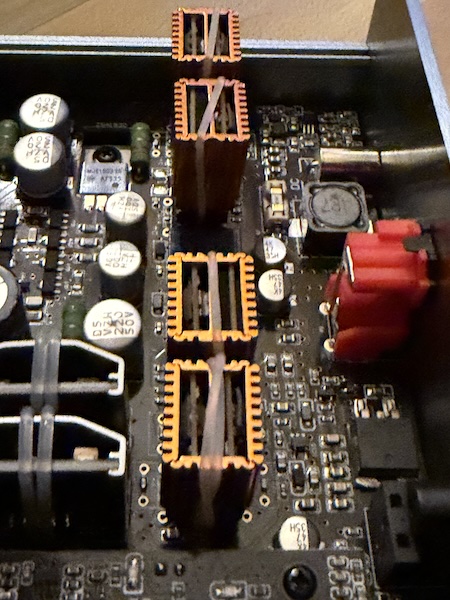
Here is a zoom in on each op-amp, note the dual channel op-amps are the one of the end and the single channel op-amps are the ones in the middle, so the JRC-5534D is the single channel op-amp and the JRC-5532D is the dual channel op-amp. So make sure you use the correct V7 vivid op-amps when replacing the stock op-amps:
 |
Important note: Be gentle when extracting the stock op-amps. I made the mistake of pulling too hard on one of the plastic extraction tools, and it snapped, this didn’t really matter as the new Burson package included some plastic pulls already:
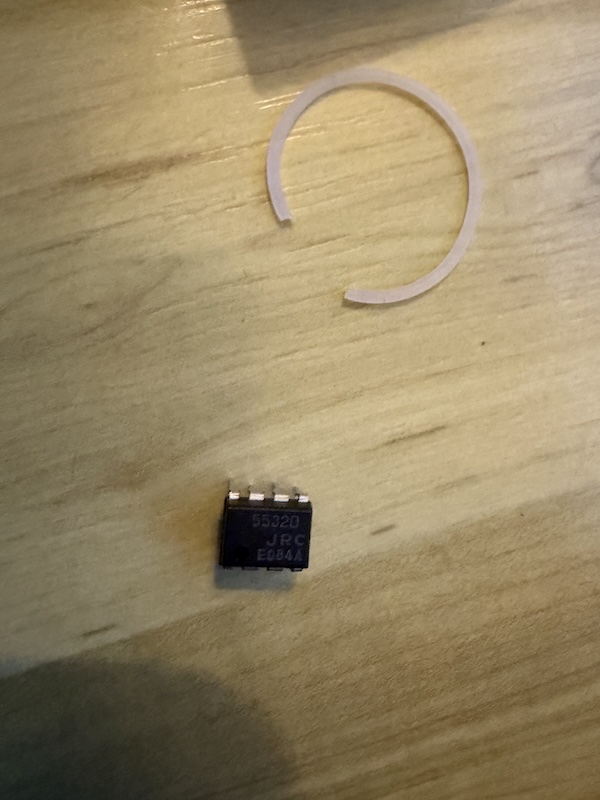
The lesson: apply slow, even pressure when removing op-amps. Wiggle them gently side-to-side if needed, but never force them, I did slightly bend the opamps when pulling them out but I fixed the pins afterwards.
Aligning and installing the V7 Vivid op-amps
Orientation is critical. Each socket has a notch or marking indicating pin 1, and the op-amps themselves have a corresponding marking (typically a half-moon notch or dot). As I mentioned earlier Burson provides clear documentation on how to correctly align the op-amps:
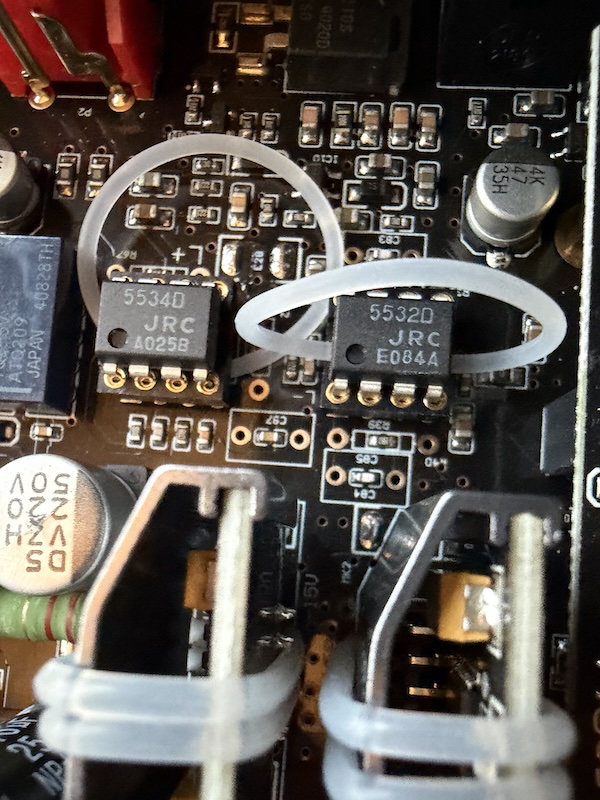
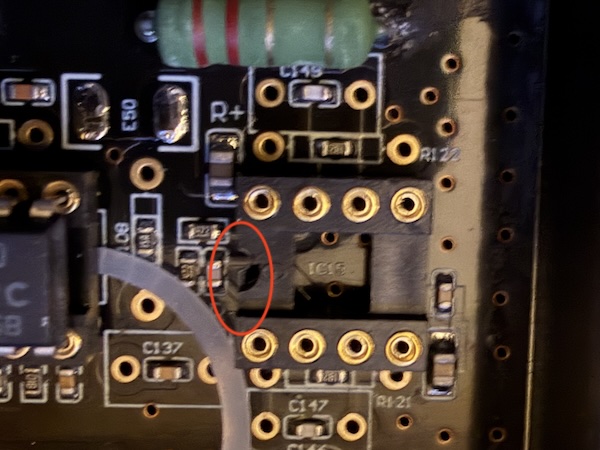
Here’s the half-moon notch highlighted on the socket — this must align with the corresponding notch on the op-amp, here I have highlighed the image with a red circle:
Align the notch on the op-amp with the marking on the socket, then press firmly and evenly until the op-amp is fully seated. I would take out all the existing op-amps first before installing the new ones.

The V7 Vivid modules are tall, so double-check clearance before reassembly, though there is no worries with either of the amplifiers I used as both are designed for larger op-amps like the V7 Vivid:
 |
 |
Closing up
When reassembling the Playmate 3, pay attention to alignment notches on the chassis to ensure everything seats properly:
With the V7 Vivids installed, the Playmate 3 closed up without any clearance issues, and the unit functioned perfectly.
Swapping Op-Amps in the Ampapa D1
The Ampapa D1 makes op-amp swapping almost trivially easy — a genuine pleasure for anyone who enjoys tinkering with class D amplifiers.
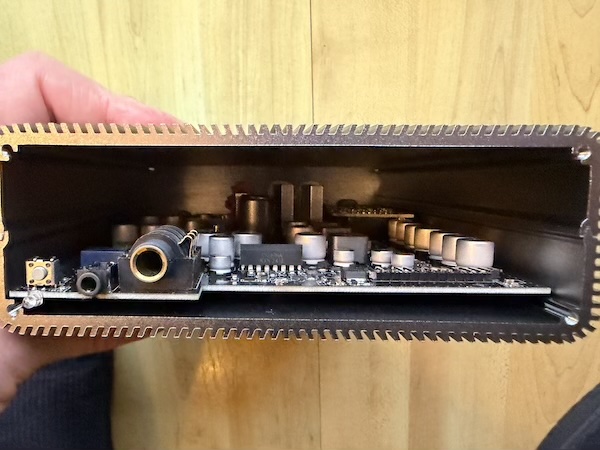
Accessing the board
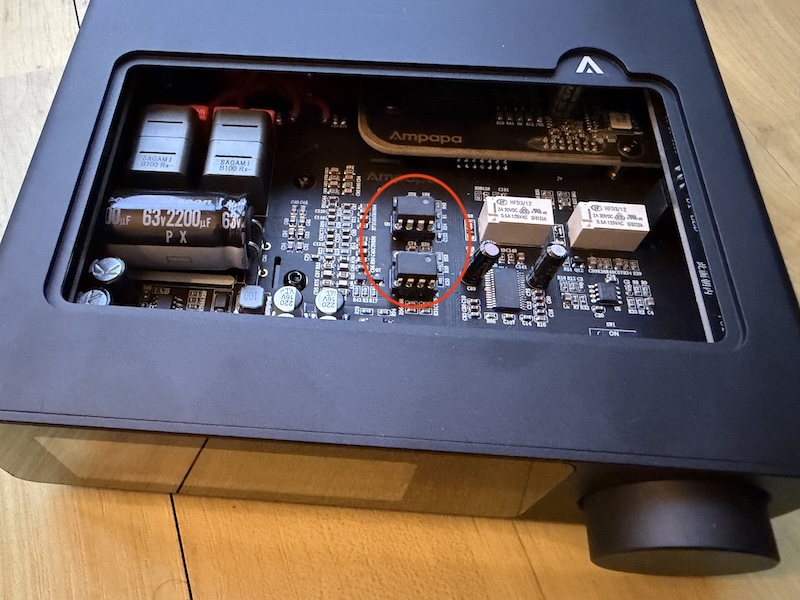
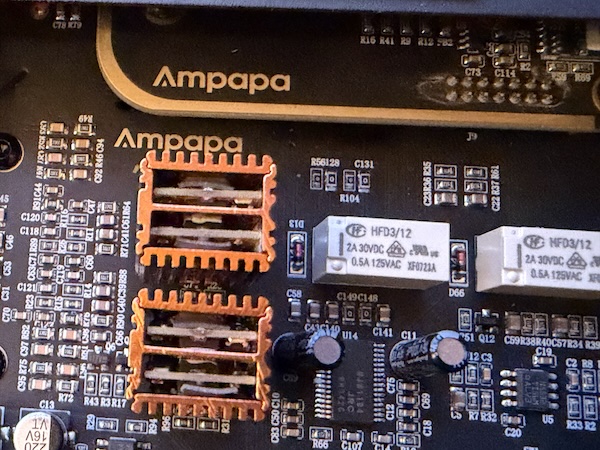
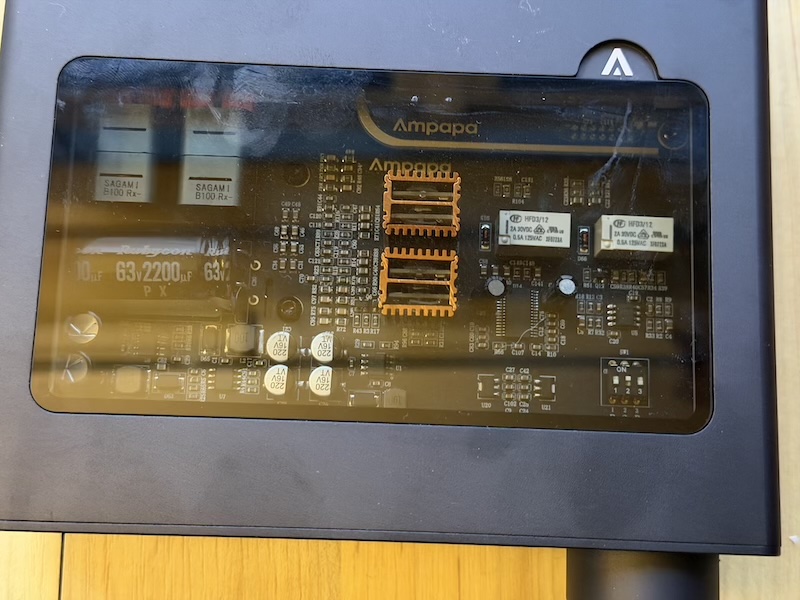
The D1’s tempered glass top simply lifts off, revealing the entire board with no disassembly required. The op-amps are immediately visible and clearly marked, I drew a red circle on the image below:
Installation
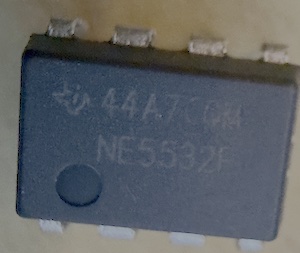
Remove the stock op-amps (they pull straight out with gentle, even pressure), the Ampapa D1 uses the very standard NE5532B op-amps:
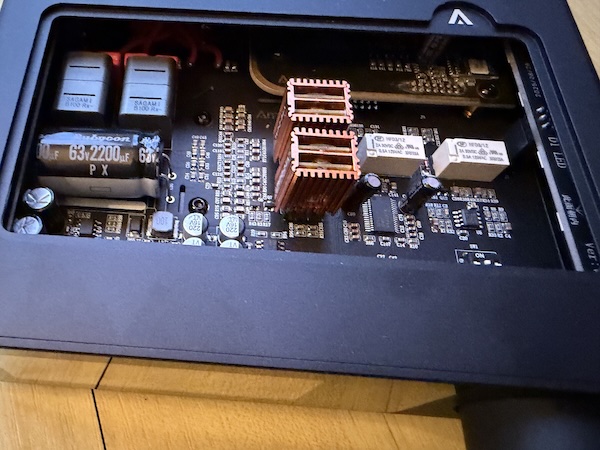
Align the V7 Vivid dual op-amps with the socket notches, and press firmly:
 |
 |
Even with the V7 Vivids’ substantial height, the glass top seated perfectly:
The entire process took minutes, and unlike nearly every other budget desktop amplifier I’ve owned from companies like A7, Aiyima and Fosi Audio there’s no chassis disassembly, no hunting for hidden screws, and no risk of damaging delicate wiring.
The D1 is hands-down the best amplifier I’ve encountered for op-amp experimentation.
Sound Impressions and Subjective Comparisons
Now for the critical question: do the V7 Vivid op-amps change the sound?
Burson Audio provides this sonic comparison chart showing their assessment of how different V7 op-amp variants compare across various sonic attributes:
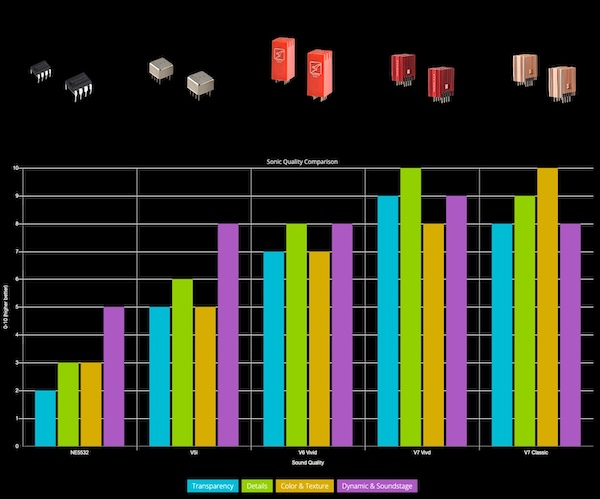
I’m including this chart as useful reference information so you can form your own opinions when conducting subjective listening tests. That said, I found this scale a little too “audiophile” in its granularity — the differences I heard between the standard op-amps and the V7 Vivid were far more subtle than this chart might suggest.
With the Burson Playmate 3
I spent the most time listening with the Playmate 3, using my Sennheiser HD600 and Meze 109 Pro as primary references. Initially, I thought I heard subtle improvements — specifically, slightly enhanced clarity and definition in the midrange on some tracks. Vocals seemed fractionally more articulate, and fine details in acoustic recordings felt marginally more resolved.
Bass: Tight and controlled with both stock and V7 Vivids. If there was a difference in texture or impact, it was below my threshold of consistent detection.
Midrange: This is where I felt the most confident difference. On tracks like Norah Jones – Don’t Know Why and Gregory Porter – Hey Laura, vocal presence seemed slightly more focused with the V7 Vivids. The effect was subtle — think of it as moving from a good seat to a slightly better one in the same concert hall.
Treble: Clean and extended with both op-amps. I didn’t perceive meaningful changes in cymbal decay or air with the V7 Vivids installed.
Overall: If pushed, I’d say the V7 Vivids delivered a mild improvement in clarity and definition with the Playmate
But I want to be clear: this is subjective, and the differences were subtle enough that I’d struggle to identify them reliably in any blind A/B test.
With the Ampapa D1
Listening through my KEF LS50 Meta speakers, the sonic differences between stock and V7 Vivid op-amps were even more minimal — roughly equivalent to switching between different DAC filter settings. Subtle changes in presentation, perhaps, but nothing I could confidently describe or repeat across multiple listening sessions.
The D1’s PFFB implementation and overall system synergy with the LS50 Metas may simply be so well-optimized that op-amp changes contribute little audible difference. Or perhaps my ears aren’t sensitive enough to detect the nuances in a speaker-based system at normal listening levels.
The honest takeaway
Op-amp rolling with the V7 Vivids is more about the process than dramatic sonic transformation. If you enjoy opening up your gear, experimenting with components, and chasing marginal gains, the V7 Vivids are beautifully made, well-engineered modules that give you something tangible to work with.
But if you’re expecting night-and-day differences, you’ll likely be disappointed. The improvements — if present — are subtle, and in many cases, you’ll get far more meaningful sonic changes from parametric EQ adjustments than from swapping op-amps.
Rating Explanation
Pragmatic rating: 4/5
Why:
- Excellent build quality and engineering for discrete op-amp modules
- Easy installation in compatible amplifiers (especially the Ampapa D1)
- Subjectively enhanced clarity and definition in the Burson Playmate 3 (minimal but detectable)
- Great for enthusiasts who enjoy the tinkering process itself
Caveats:
- Expensive for the magnitude of sonic change (if any)
- Differences are subtle at best; you’ll get more meaningful improvements from PEQ
- Requires compatible amplifiers with socketed op-amps
- Height clearance can be an issue in some chassis designs
Who it’s for:
- DIY enthusiasts and tinkerers who enjoy modding their audio equipment
- Owners of Burson amplifiers (Playmate, Conductor) looking to experiment with op-amp rolling
- Users with easy-access designs like the Ampapa D1 who want to try subtle tweaks
- Anyone who values the process of experimentation as much as the outcome
Not recommended for:
- Users seeking dramatic, easily audible improvements (use PEQ instead)
- Those without compatible amplifiers or the patience for careful installation
- Budget-conscious listeners who want maximum sonic improvement per dollar spent
Conclusion
The Burson V7 Vivid op-amps are premium components aimed squarely at enthusiasts who enjoy the process of tweaking and modding their gear. They’re beautifully made, thoughtfully engineered, and subjectively delivered subtle improvements in clarity and definition when installed in my Burson Playmate 3.
But let’s be honest: the sonic differences are minimal, and in many cases, you’d achieve more meaningful improvements with parametric EQ. The real appeal here is the experience — the tactile satisfaction of opening up your amplifier, installing premium components, and knowing you’ve personalized your setup.
If that resonates with you, and you own a compatible amplifier (especially something as accessible as the Ampapa D1), the V7 Vivids are an excellent choice. If you’re purely outcome-focused and want the biggest sonic bang for your buck, invest in better source material, room treatment, or EQ software instead.
For me, the V7 Vivids earn a solid 4 stars: great for the right audience, but not essential for most listeners.